User Guide
Overview
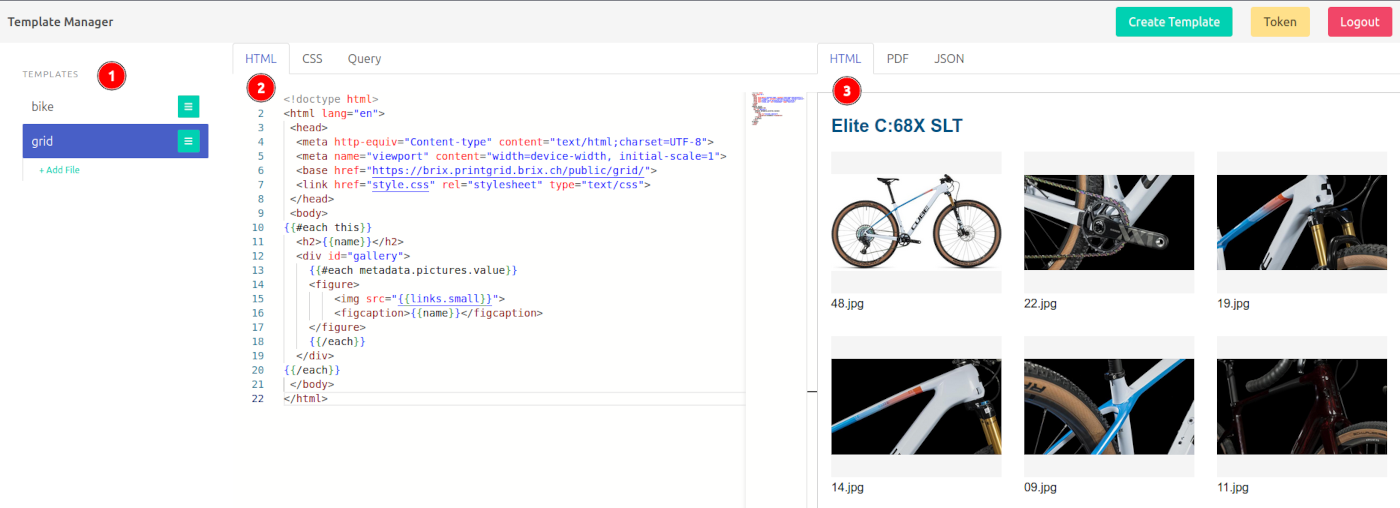
- The template manager, simply a list of all available templates (consisting of an index.html and a style.css, plus ancillary files such as a logo.png).
- The main editing area, containing the HTML and CSS of the current template. Additionally, the query tab enables you to fetch sample data from a live system.
- The preview area, usually just as fast rendering HTML, but you can also generate a PDF or the sample data fetched via the query tab.
Fetching sample data
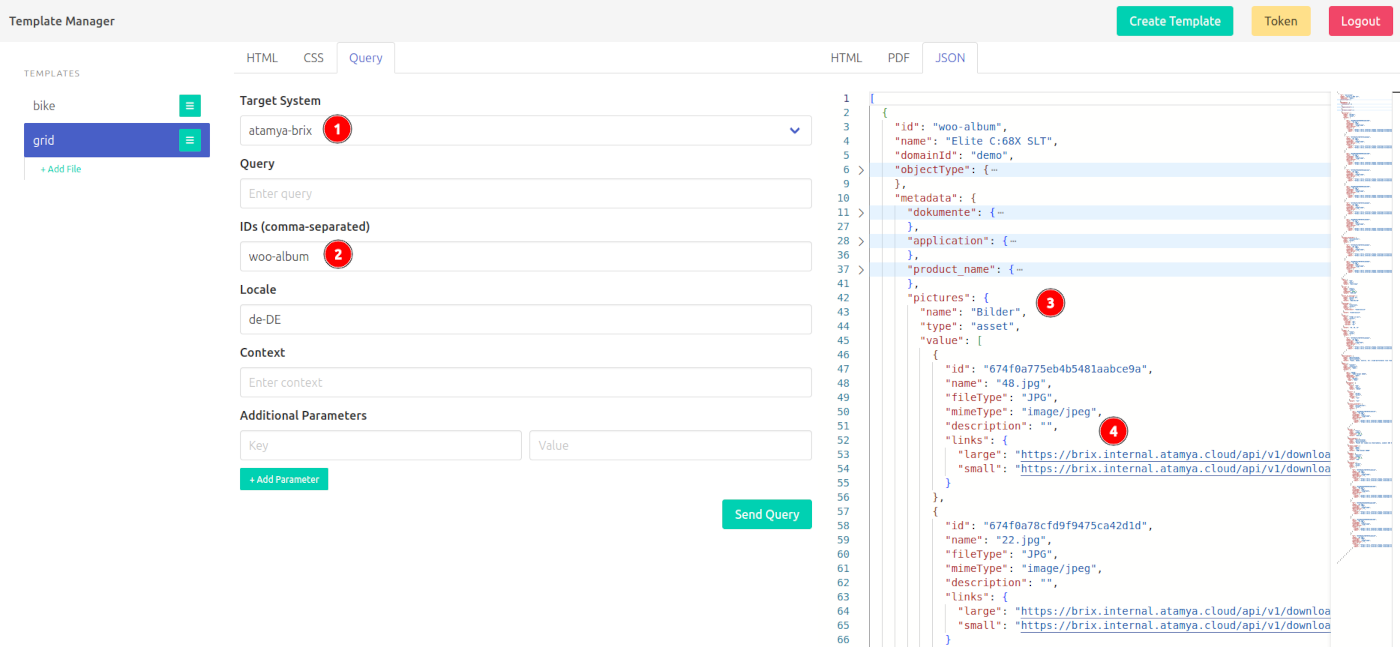
- Select the system you with to connect to (currently, this is pure configuration)
- Enter an ID of a known object you with to fetch (optionally you may also set a locale and additional context)
- After sending the query, your results will show up here. This is a read-only version of the editors on the left, so you can still fold and search as usual.
- The data structure largely depends on your source, we'll cover this specific example later on.
Obtaining a token
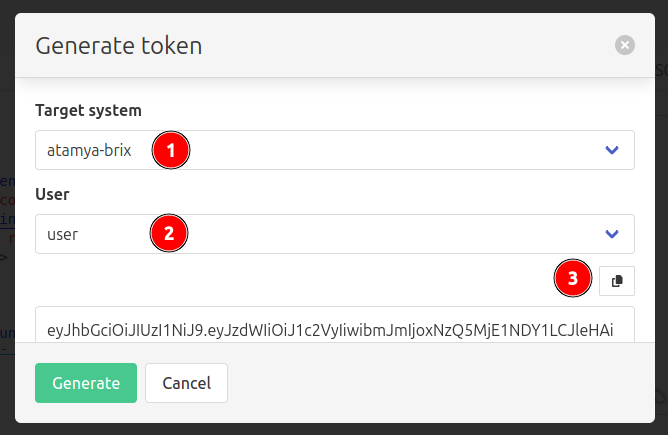
- Select the system you with to connect to.
- Select a role. If you just want to print, select "user" (so that token can't modify templates).
- Hit "Generate", and copy the resulting token to your clipboard to use it somewhere else.
Templating
We'll assume knowledge of HTML/CSS, as documenting that here as well wouldn't scale.
The templating language is Handlebars (the {{ }} bits), go read their guide for a complete picture. We'll cover the basics:
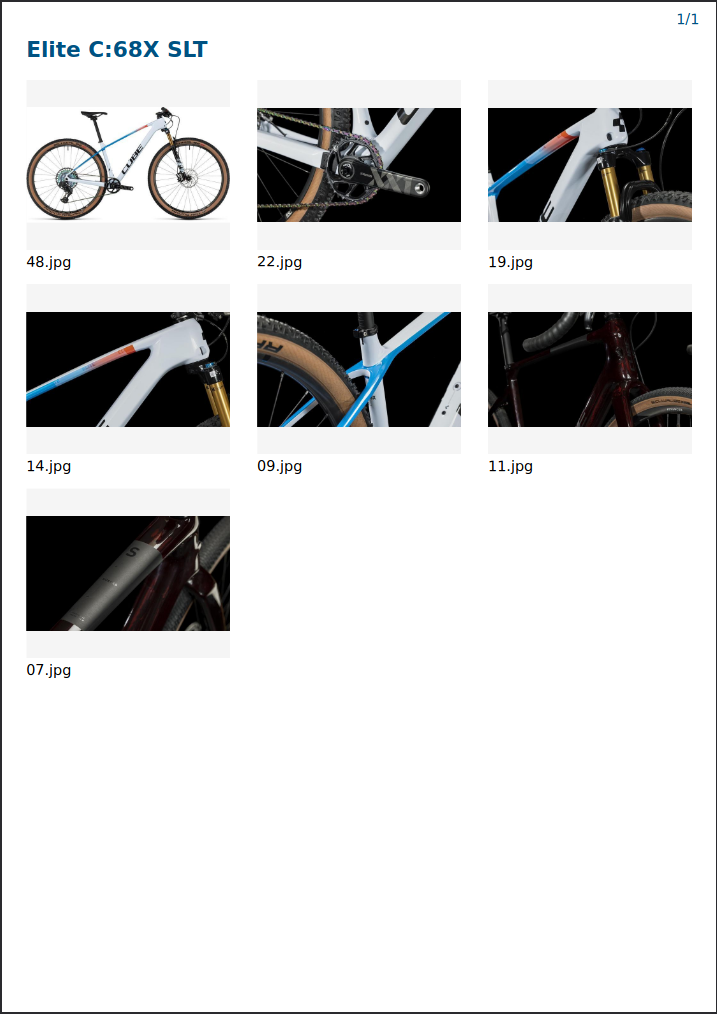
Hello World
PrintGrid was designed to print many objects at once, so you will always receive an array of data, even if you only asked for one.
Suppose you need a simple contact print:
from the following data:
[
  {
    "id": "some-sku",
    "name": "Elite C:68X SLT",
    "metadata": {
      "pictures": {
        "name": "Pictures",
        "value": [
          {
            "id": "674f0a775eb4b5481aabce9a",
            "name": "48.jpg",
            "fileType": "JPG",
            "mimeType": "image/jpeg",
            "links": {
              "large": "https://some.image/large.jpg",
              "small": "https://some.image/small.jpg"
            }
          },
          {
            "id": "674f0a78cfd9f9475ca42d1d",
            "name": "22.jpg",
            "fileType": "JPG",
            "mimeType": "image/jpeg",
            "links": {
              "large": "https://some.image/large.jpg",
              "small": "https://some.image/small.jpg"
            }
          }
          /* ... snip ...*/
        ]
      }
      /* ... snip ...*/
    }
  }
]
HTML
- Iterate over the top-level array using
{{#each this}}and{{/each}} - display the
{{name}}of the object - finally iterate over its pictures
{{#each metadata.pictures.value}}to display its{{links.small}}
<!doctype html>
<html lang="en">
 <head>
  <meta http-equiv="Content-type" content="text/html;charset=UTF-8">
  <meta name="viewport" content="width=device-width, initial-scale=1">
  <base href="https://brix.printgrid.brix.ch/public/grid/">
  <link href="./style.css" rel="stylesheet" type="text/css">
 </head>
 <body>
{{#each this}}
  <h2>{{name}}</h2>
  <div id="gallery">
    {{#each metadata.pictures.value}}
    <figure>
        <img src="{{links.small}}">
        <figcaption>{{name}}</figcaption>
    </figure>
    {{/each}}
  </div>
{{/each}}
 </body>
</html>
Basically we're just shimmying down the structure of the JSON data. Note that the overall structure will always be the same, but certain metadata formats may depend on the $PIM you're using.
When copying templates around, ensure that the
<base href="">is still pointing at the correct back-end, otherwise all relative paths will break (e.g../style.css)
CSS
@media print {
    @page {
        size: A4; /* important for the PDF */
        margin: 5mm;

        @top-right { /* page counter */
            padding-top: 7mm;
            content: counter(page) "/" counter(pages);
            color: #005282;
        }
    }
}
html {
    font-family: 'Arial', sans-serif;
}
h2 {
    color: #005282;
    break-before: always; /* to get a new page per object */
}
#gallery {
    display: flex;
    flex-wrap: wrap;
    justify-content: space-between;
    gap: 5mm;
}
figure {
    margin: 0;
    width: 60mm;
    height: 60mm;
    break-inside: avoid;
}
figure img {
    object-fit: contain;
    width: 60mm;
    height: 50mm;
    background-color: #f5f5f5;
}
... and that's it.
Note that your mileage may vary depending on the PDF rendering engine that is used, so something that looks good in the preview window might not work well in the PDF.
Handlebars Helpers
Handlebars does support some built-in helpers, such as {{#if}}, {{#unless}}, {{#each}}, and {{#with}}. However, PrintGrid also provides some additional helpers that are useful. An extensive list of all added helpers can be found below. Contact us if support for other helpers is needed.
This is an example of how to use these helpers in a template:
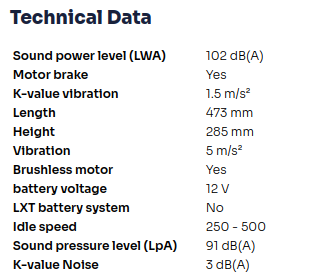
    <h2>Technical Data</h2>
    <table>
        {{#each metadata}}
            {{#eq group "technical"}}<!-- only values from the group "technical" -->
                {{#neq @key "battery-type"}<!-- but not if the key is "battery-type" -->
                <tr>
                    <td>{{name}}</td>
                    <td>{{value}}{{#if measurement}} {{measurement.symbol}}{{/if}}</td>
                </tr>
                {{/neq}
            {{/eq}}
        {{/each}}
    </table>
... this yields a table containing only the technical data by filtering on {{#eq group "technical"}}.
eq
Signature:
{{#eq a b}}…{{else}}…{{/eq}}Description: Renders the first block if a === b, otherwise the {{else}} block.
Example:
{{#eq status "published"}}
  This item is published.
{{else}}
  This item is not published.
{{/eq}}
neq
Signature:
{{#neq a b}}…{{/neq}}Description: Renders the block if a !== b.
Example:
{{#neq @key "battery-type"}}
  <tr><td>{{name}}</td><td>{{value}}</td></tr>
{{/neq}}
lt
Signature:
{{#lt a b}}…{{/lt}}Description: Renders the block if a < b.
Example:
{{#lt items.length 1}}
  <p>No items found.</p>
{{/lt}}
lte
Signature:
{{#lte a b}}…{{/lte}}Description: Renders the block if a <= b.
Example:
{{#lte items.length 0}}
  <p>Empty list.</p>
{{/lte}}
gt
Signature:
{{#gt a b}}…{{/gt}}Description: Renders the block if a > b.
Example:
{{#gt items.length 0}}
  <p>Some items exist.</p>
{{/gt}}
gte
Signature:
{{#gte a b}}…{{/gte}}Description: Renders the block if a >= b.
Example:
{{#gte items.length 1}}
  <p>Some items exist.</p>
{{/gte}}
toRegex
Signature:
{{toRegex patternString}}Description: Converts a non-empty string to a JavaScript RegExp. Returns an empty string on invalid input.
Example:
{{#if (test title (toRegex "^[A-Z]"))}}
  <p>Title starts with uppercase.</p>
{{/if}}
test
Signature:
{{#if (test inputString regex)}}…{{/if}}Description: Returns true if regex.test(inputString) is true.
Example:
{{#if (test email (toRegex "^[^@]+@[^.]+\..+$"))}}
  <p>Valid email.</p>
{{else}}
  <p>Invalid email.</p>
{{/if}}
now
Additionally, the helper {{now}} allows you to get the current time, and it takes a pattern such as {{now "MMMM yyyy"}} to get June 2025 (useful to show how old the PDF is).
Created: {{now "MMMM yyyy"}}PDF features
The PDF engine usually offers a way to count pages, which is handy for adding a "page x of y" type display. Suppose you have a
Page <span class="currentPage"></span> of <span class="totalPages"></span>... then you can use the counter feature in CSS via the content property:
.currentPage:after {
    content: counter(page);
}
.totalPages:after {
    content: counter(pages);
}
... yielding "Page 1 of 2", for example. Note that this will only work in the PDF preview, as HTML is unpaged media.
© brix Solutions AG