User Guide
System Requirements
The brix:papilio online publishing system works in every modern browser.
Please ensure that JavaScript and cookies are enabled, a PDF viewer (such as Adobe Reader) is installed as a browser plug-in and pop-up blockers are disabled for this address. You can test if you meet these requirements by clicking on the "system requirements"-link below the login form.
Should you have forgotten your login credentials, simply use the "Forgot your password?"-link below the input. After entering your username or the E-mail address associated with your account, you will receive a mail containing a password reset link. Click on it to set your new password.
After 5 unsuccessful login attempts your account will be disabled for one hour.
Navigation
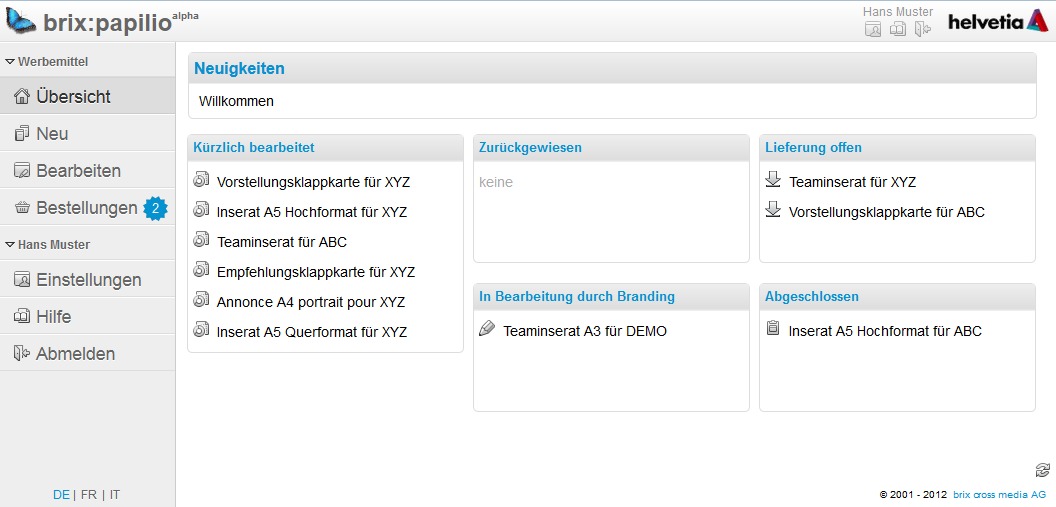
The main menu on the left-hand side contains more or less navigation elements, depending on your privileges.
Menu
Normal users will see the following menu entries:
Header
The header contains the following items for all users
- left: Logo and current version of brix:papilio
- center: System messages
- right: Name of the logged-in user and icons for quick access to "Settings", "Help" and "Logout"; Logo of the tenant
Tables
Practically all tables in the system have the following features:
- Sortable by clicking on the heading of a column
- Show/hide columns (upper right)
- Search in all cell contents using the search field (upper right)
- Pagination. The number of rows per page can be configured (lower left)
- Double clicking a row triggers its default action (usually what the first button of the row would do)
Logout
In order to prevent others accessing your account, always use the logout-button when leaving the application. After 30 minutes of inactivity, a "session time-out" will occur, logging you out. Any unsaved changes will be lost.
Overview
After you have logged in successfully, an overview will be shown.
Relevant news will be displayed at the top, which may be changed by an administrator.
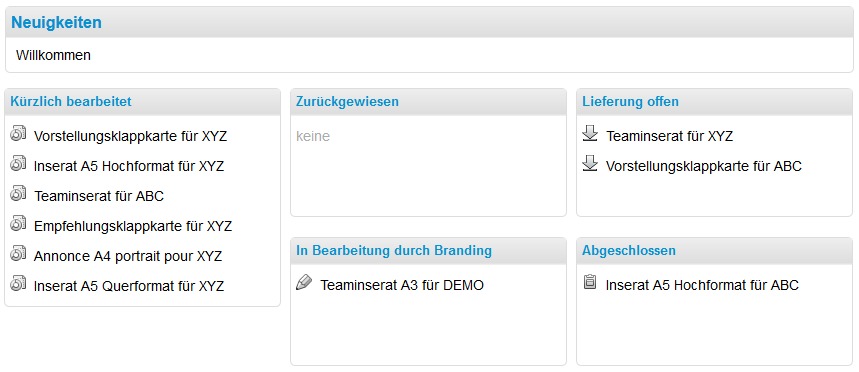
The following boxes may be reordered to your liking using drag&drop. To restore the default state, click on the icon in the lower right corner.
These boxes contain 10 orders each, sorted by their status as follows:
| Recently Modified | Publications that have been created and edited, but not ordered yet |
| In Control | Publications that have been ordered, but have not yet been released by the controller. Only shown when a controller workflow is active. |
| Rejected | Publications that have been rejected by either the controller or the graphics department (for manual special format orders) |
| Layouting | Manual special format orders that are currently being created by the graphics department |
| Delivery pending | Orders that are ready, but have not yet been downloaded (or sent in case of physical output) |
| Completed | Completed orders |
Selecting a template
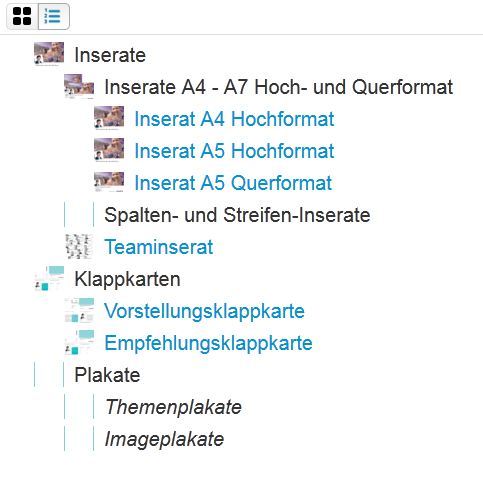
In order to create a new publication, use the menu item "New" and browse the available templates (grouped) until you find the template you'd like to use.
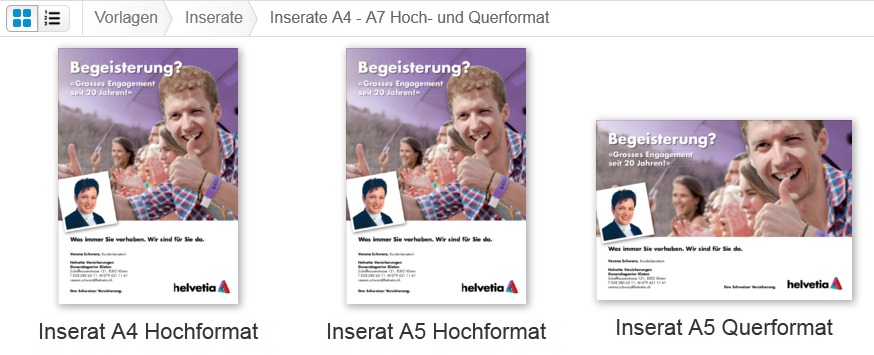
Using the path displayed at the top, you can navigate back to any level in one click. As an alternative to the tablet view there's also a tree view available, displaying nested groups and templates all at once.
Editing
Using the menu item "Edit" takes you directly to a list of open and rejected publications.
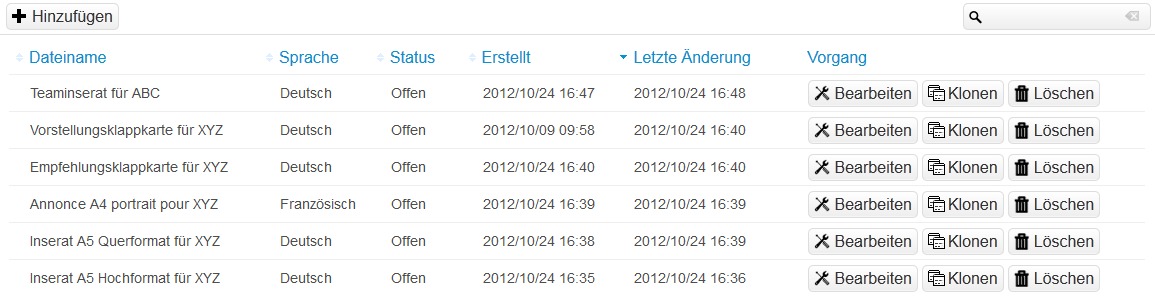
This list may be sorted by clicking on any column header. You can also use the search field at the top right to filter the entries.
The following operations are available Edit, Clone (create copy of) and Delete the publication.
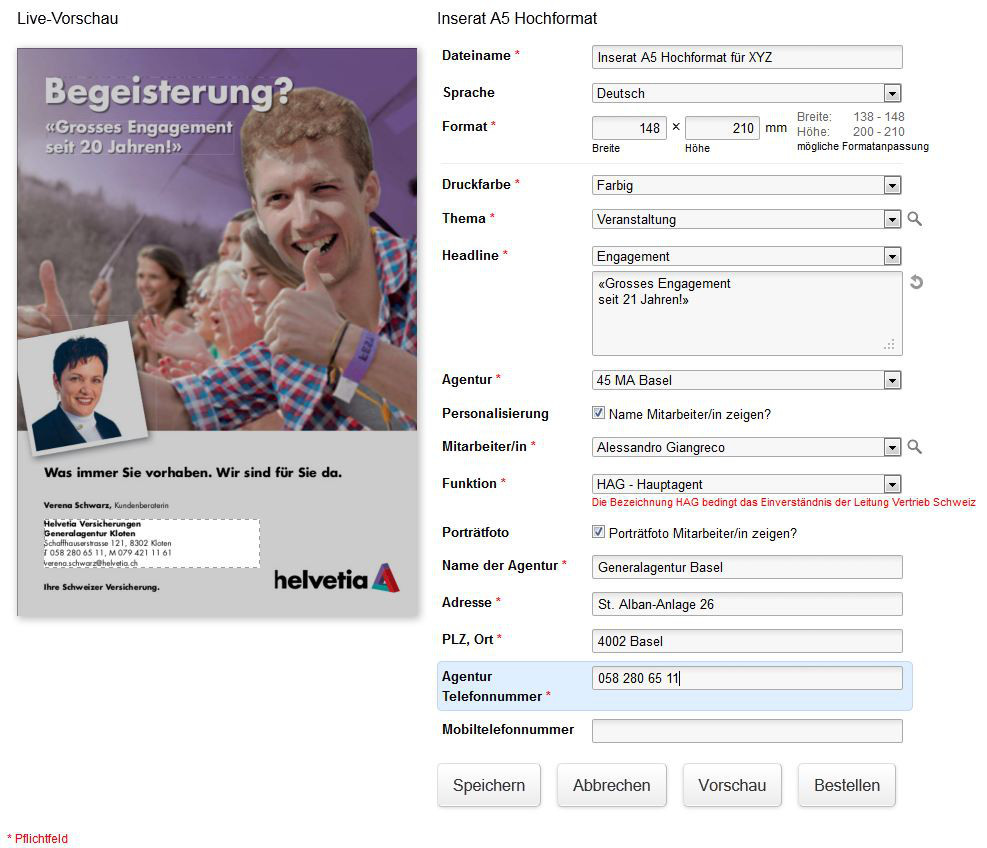
Firstly, give your order a unique and telling name, overwriting the default title. Then choose the language. Certain templates allow you to adapt the format to your needs (within defined limits), scaling the template intelligently.
The remaining inputs can be selected and/or edited according to the CI/CD guidelines. Required fields are marked with a * . Certain inputs have relations to other input fields, updating them dynamically if the first one changes. Additionally, the administrator may have defined visibility relations, allowing for unsuitable inputs to be hidden, depending on the current selection.
Editable inputs sport various helper icons on the right-hand side, such as for showing previously entered but since overwritten texts. Multi-line inputs may be resized by dragging the lower right corner. If a maximum number of characters has been defined for that field, the number of remaining characters will be shown on the right side as well. Some texts originating from drop-downs are editable, others aren't (shown as a disabled input). Selecting the helper resets the text to the default value.
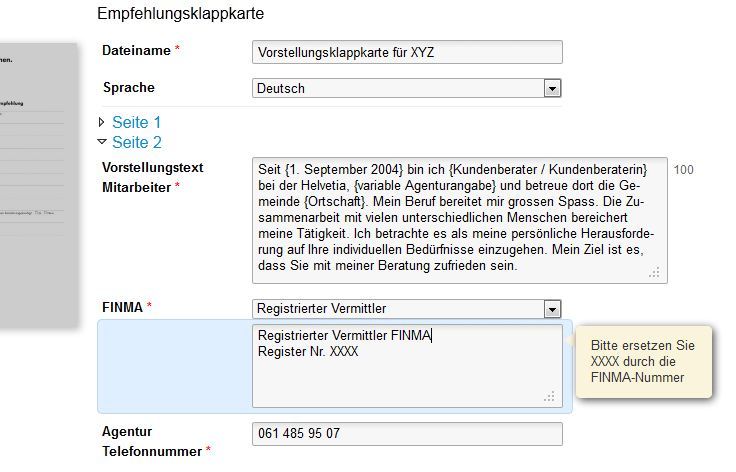
If a hint for the current input has been defined, a yellow bubble will be shown on focus. Certain values can also have individual hints and warnings, shown in red below the input when such a value is selected.
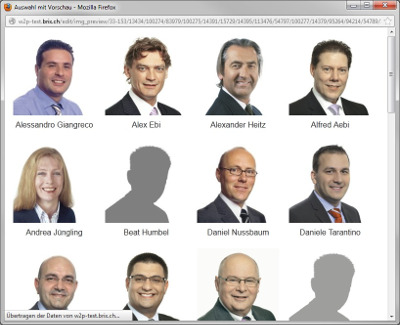
On templates with multiple pages, only one page will be shown at a time. Proceed to the next page by clicking on the appropriate page header. For the selection of images, a visual method is provided alongside the usual drop-down selection. Simply click on the helper to get a pop-up with image thumbnails.
| At the bottom of the page, the following options are provided: | ||
|---|---|---|
| Save | Saves the publication (will then appear under the name you assigned in the overview under "recently modified"). We recommend that you save regularly. | |
| Cancel | Return to the list of open publications. Any unsaved changes will be lost. | |
| Preview | PDF preview of the publication being edited. Despite the live preview being updated after leaving an input field, we recommend that you have a close look at that PDF before ordering. | |
| Order | Place the order for the current publication. |
Ordering a publication
After you have inspected your publication using the PDF preview, you can place the order.
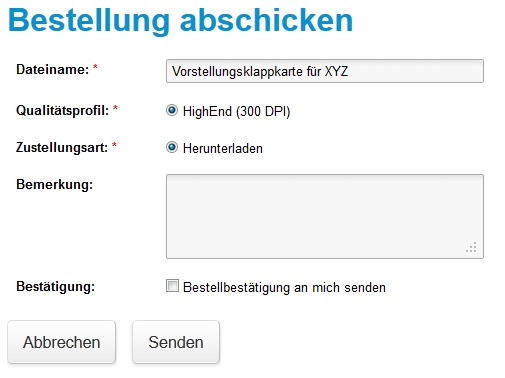
Make sure that the name you set for the publication accurately describes it (so you can find it more easily later on). Depending on the settings of the template, you may set the quality profile and the desired delivery method, as well as post a remark for special instructions etc. This is especially recommended for manual special formats to provide the graphics department with additional information. Finally you can opt-in to receive a confirmation mail.
Order overview
When using the menu item "Orders", a list of all publications that you have ordered in the past will be shown. As mentioned previously for the list of open publications (see Editing), this list can be sorted by clicking on the columns and filtered using the search field at the top right.
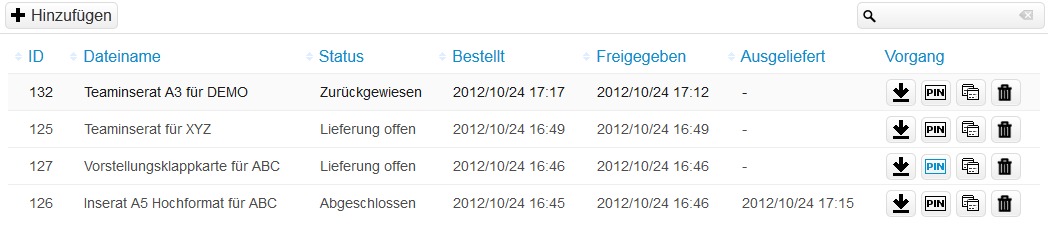
The following operations are available:
| Download | Takes you to the PDF download page of that order. |
| PIN-Code | If the icon is blue, a PIN-code already exists for this publication. Click to see/remove. |
| Clone | Creates an exact copy of that order with all inputs filled in. Useful for ordering a similar publication again. |
| Delete | Delete the publication after confirming your action in the dialog shown. |
PIN-code
Because High-End PDFs tend to be rather big, they can not always be sent via E-mail. Therefore we offer the option to create a PIN-code for publications, which can then be sent instead.
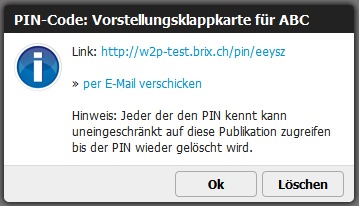
Use the "send by E-Mail"-link to launch your E-mail client. The link will be pasted in automatically. Since you have no real control over who sees and uses such a PIN-code, it is recommended to delete it after use.
Settings
The menu item "Settings" allows you to change your user data, preferred unit of measurement and turn off warning dialogs.

© brix Solutions AG